To export all the required project files from Tekla Structures, there are two options:
Download the Tekla Structures TSEP plugin and generate the correct project ZIP automatically;
Piece the ZIP file together manually via individually exported files provided by your detailer.
We recommend using TSEP plugin, since it’s easier to export files with it. Click here to navigate to TSEP plugin guide.
Tip
If you prefer to follow step-by-step instructions, please refer to this guide.
Step 1: Export Project IFC
To export the complete project IFC file from Tekla Structures:
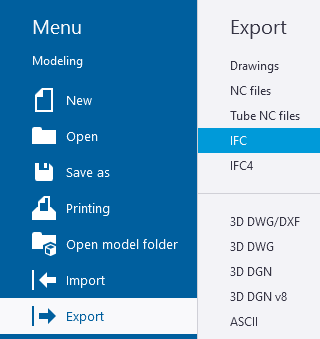
1. Go to Export and select IFC (2×3). Once selected, a dialogue window will open.
2. Configure Parameters Tab for IFC:
Output file – Select the desired location of the output file and file name. We suggest using the project name in the file.
File Format – “IFC“
Export Type – SteelFabricationView (critical)
Warning
It is important to select "Steel fabrication view".
Leaving the default at "Coordination view" will exclude important items, such as bolt holes.
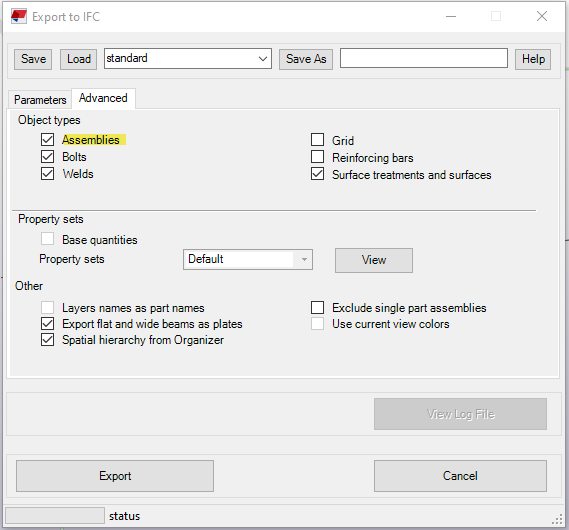
3. Configure Advanced tab:
Object Types Section (Checked on):
Assemblies (critical)
Bolts (optional)
Welds (optional)
Surface treatments and surfaces
Other Section (Checked on):
Export flat and wide beams as plates
Spatial hierarchy from Organizer
4. Once complete, select Export to export the project IFC
There is a good walkthrough video on YouTube if you are unsure of this process, see below.
Step 2: Export KSS File
In order to create a KSS file you must:
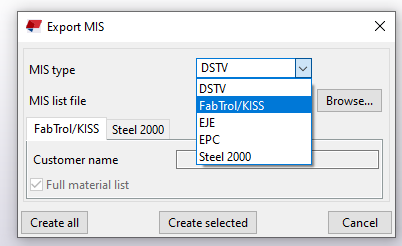
Select menu in top right corner and go to Export – MIS.
In the pull-down select Fabtrol/KISS.
Select Create all or Create selected as needed.
Navigate to the TeklaStructuresModels folder to locate the file.
Step 3: Get PDF files
PDF files that contain assembly drawings are optional, however, if you want to have PDF drawing files available on the tablet, please get them from the detailer.
If you obtained such files from the detailer, please make sure that the files correspond to the following:
PDF Assemblies (in folder)
Contains individual *.pdf files for each assembly. The PDF file name should start with the assembly name (i.e. “B1000-r0.pdf”)
If an assembly requires more than one PDF, they should be merged into one file(i.e. “B1000-1-r0” and “B1000-2-r0” should be combined and saved as “B1000-r0”).
If hyphens are used in assembly names, they must be reflected and present in the PDF file name.
PDF Parts (in folder)
Contains individual PDF files for each part;
Should use the same naming convention as an assembly PDF.
Step 4: Create ZIP
Windows instructions
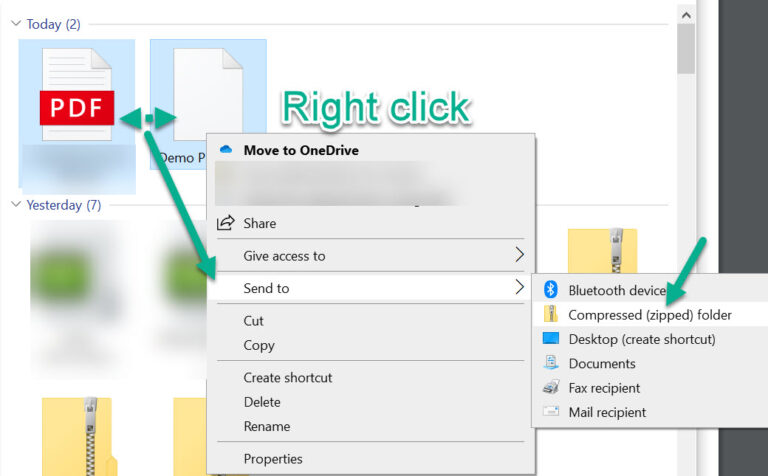
1. To place multiple files into a zip folder, select all the files while hitting the Ctrl button.
2. Right-click on one of the files, move your cursor over the “Send to” option and select “Compressed (zipped) folder”.
The resulting ZIP file will contain all the selected files and will be named after the file that you right-clicked on.
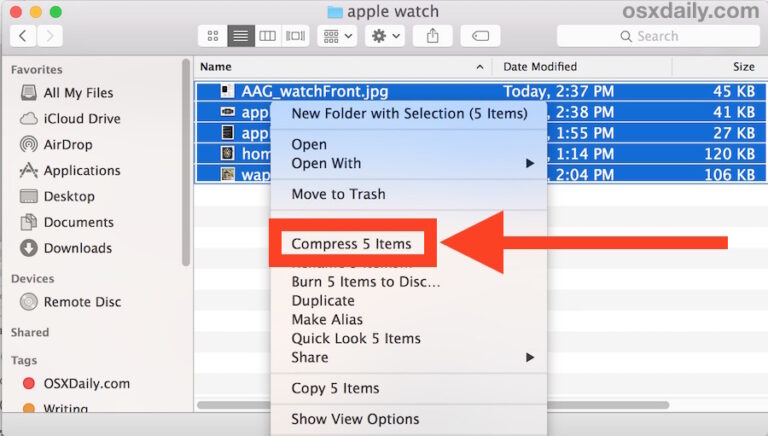
MAC instructions
1. Locate the items to zip in the Mac Finder (file system)
2. Right-click on a file, folder, or files you want to zip
3. Select “Compress Items”
4. Find the newly created .zip archive in the same directory
What's next?
If it's your first time assembling the files, use this form.
Eterio Realities Inc. is a software development company that specializes in Augmented Reality for industry 4.0. Our flagship product, FabStation, uses break-through Mixed Reality technologies to visually place 3D assets into a worker’s normal workflow. This is done through the use of devices like the Hololens 2.